Recent Articles
Quick links
- Back up your photos and videos
- Set up your new phone and move the data
Switching to a new smartphone is always exciting. Unpacking and booting up a phone for the first time to get a feel for the new hardware and software never gets boring. Many users find it satisfying to set up their new smartphone from scratch and customize it differently than before. But even then, you should make sure that your important data and things like photos and contacts are transferred to your new phone. Letting go of all those important data and files with your old phone can really rain down on your parade, so don’t let that happen. In this article, we will guide you step by step through all the steps to help you transfer files and data from old Android phone to new one. Let’s dive in!
We use a Google Pixel 7 and a OnePlus 10 Pro to take the screenshots and show you all the steps of the process. You can follow the same steps on most Android phones, regardless of which OEM it is from.
Google makes it pretty easy to switch from one Android phone to another without losing your data or files in the process. However, there are a few things you need to do to ensure a smooth transition.
Backup your old phone
The first thing you need to do before setting up your new phone is to backup your old phone. You can also transfer your data without creating a backup, but that comes in handy when you don’t have your old device to restore your data. Also, it’s just a good habit to take frequent backups of your data just in case.
- Open the settings page on your Android phone and look for an option called system.
- In the system menu you will see the fuse Option that allows you to create a backup of the data on your current phone.
- If this is your first time creating a backup, select it turn on button to see what you can backup and also how much space you have left in your Google One for backup.
- You can just hit them Secure now Button to create a new backup if you have never created one in the past.
- Once you select this option and enter your PIN (assuming you have set a screen lock), the phone will start creating a backup of your data that can be transferred to your new phone.
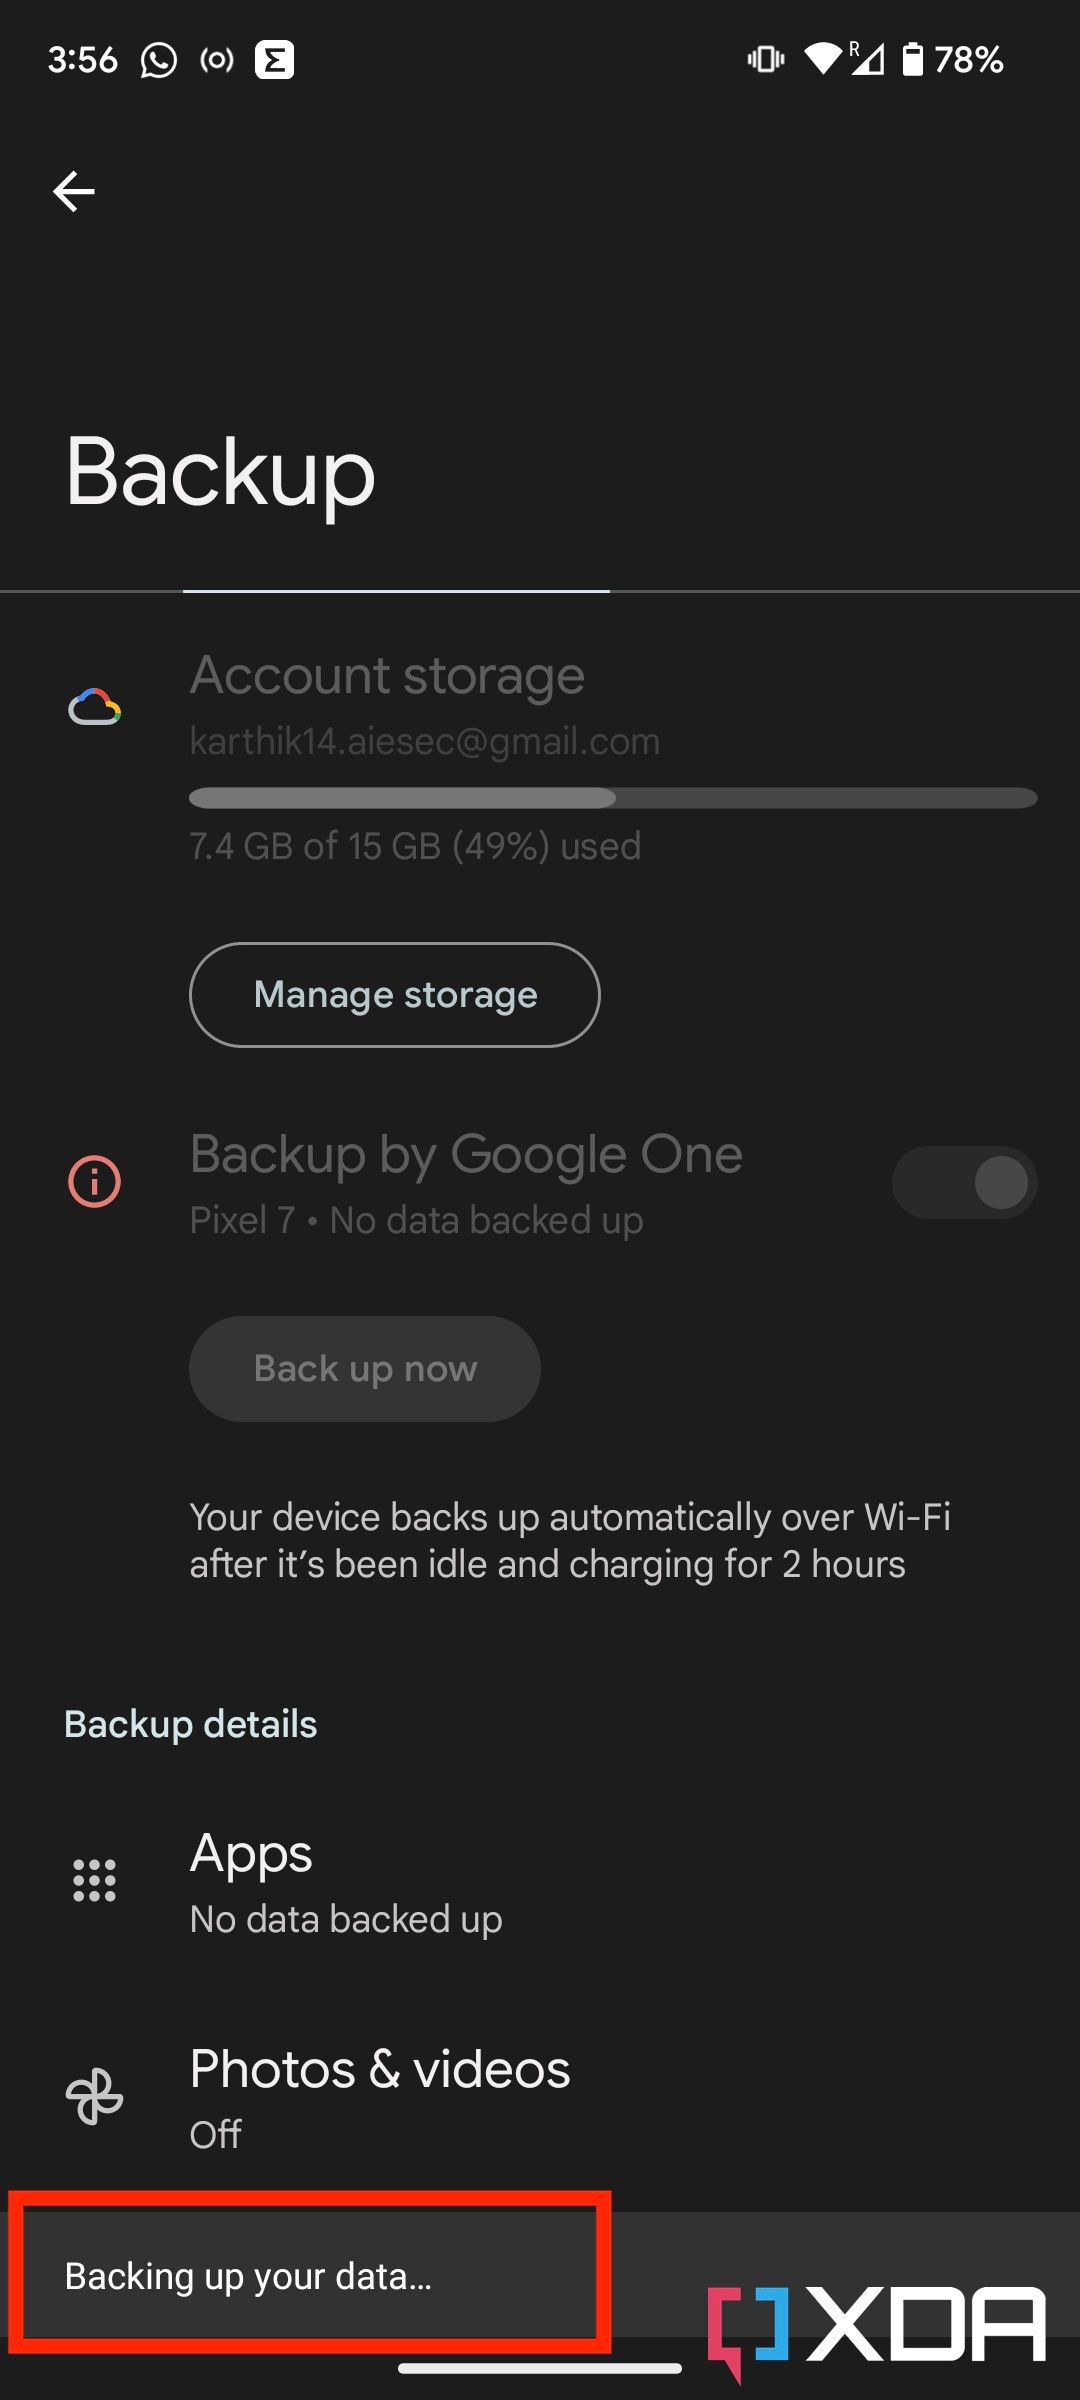

It may take a few minutes for your phone to backup and you will see the backup screen is greyed out during the process.
Back up your photos and videos
You also need to create a backup of the photos and videos you have taken with your current phone. That’s how it’s done:
- Choose Photos & Videos from the Google Backup page.
- Switch now Backup and sync switch to display a list of Google accounts from which you can select one to back up. You’ll also see the remaining storage space in that account, making it easy to determine which one you should choose.
- Once inside, choose the Upload Size option and choose the quality you want for uploads.
And that’s it, the pictures and videos on your old phone will now be synced to your Google Photos account.
Set up your new phone and move the data
There are several ways you can transfer data from your existing phone to a new one. You can either move your data directly if you still have your old phone, or you can restore it from a backup like the one you just created. Let’s see how to move the data if you still have your old phone:
Moving data with a USB cable
Yes, you will need a USB cable that fits both your old and new phone to complete the steps below. If you don’t have a cable, continue to the next section where we explain how to transfer the data wirelessly.
- Choose Next or Getting started button on the welcome screen to start the process.
- You will first be asked to choose a language, insert a SIM card and connect to a Wi-Fi network. Inserting a SIM card is optional, but you’ll need to connect to a Wi-Fi network to restore your phone wirelessly. So select that to land on the screen where you will see an option to copy your apps and data.
- Have your old device ready, along with a USB cable, for the next step and select it Next.
- Now simply connect both devices via cable and select Next.
- You will now see a prompt on your old one asking if you want to copy. Confirm this by selecting Copy.
- Now on your new phone you need to verify your email account to see the list of items you can take along with the backup size. You can select the ones you want or just select and type everything Copy.
Your new phone will now start copying your data. Depending on the amount of content you’re copying, it may take a few minutes to complete the process, but you can set other things like screen lock, Google Assistant, and more in the meantime. Once everything is done you will see a prompt on your phone confirming the same thing. After that, you can disconnect the phones and press Completed.
Move data without a USB cable
If you don’t have a USB cable that fits both your old phone and your new phone, follow these steps to wirelessly transfer your data between the two devices:
- If you don’t have a USB cable, select one No cable? when asked whether you can use a cable or not. You’ll find this option in the lower-left corner of the first page of the process.
- You’ll now get a prompt telling you to use a cable to move things faster, but you can just type Continue to ignore that.
- Choose Next When told you can move wirelessly to start the process.
- Now go to your old phone and open the Google app. You may not need to do this if you received a notification for the setup process.
- If you haven’t received one, go to the Google app and type “set up my device” in the search box.
- You will now be prompted to verify that the four shapes you see on both phones match. If yes, choose Next on your old device to continue.
- Choose Copy and verify your identity on your old phone to get started.
- At this point you have the option to choose what you want to copy from your old phone. Select the items you want to bring and go ahead Copy to start the process.
And that’s it! Your new phone will now copy the selected items. It may take a few minutes, but you can proceed to set up things like the lock screen, Google settings, and more.
Restore from a backup
What if you don’t have access to your old phone to transfer your data? Well, Google also gives you the option to restore your backed up data, so you can still restore everything from the cloud. This is essentially pulled from the backup we made earlier in this guide. So if you skipped this part and never backed up your phone, you will need to set up your new phone as a new device from scratch. But if you were smart enough to backup your old phone before getting rid of it, then follow the steps given below to get started:
- Once you start your new phone and get to the screen where you will see an option to copy apps and data, select Next.
- Now you will see an option that says Can’t use the old device? in the lower left corner of your screen. Select that to continue.
- You’re now warned that you might not be able to get as much data back without your old phone, but you have little choice but to shrug and type OK.
- You will then be asked to sign in to your Google account so it can find the backup you made earlier.
- Once it finds and displays the backup file, you can select it and verify your identity to continue.
- On the next screen you will see the data that you can transfer from the cloud to your new device. Choose what you need and click Restore.
Your new phone will now begin copying your selected data from the cloud, but you can continue setting up your phone in the meantime.
And that brings us to the end of this particular tutorial. Congratulations on purchasing and setting up your new Android phone. It may take some time for your new device to reinstall all of your apps, but that shouldn’t stop you from exploring everything your new device has in store for you. While you’re here, be sure to check out our list of first things to do on a new Android phone. It will help you get started if you are new to the world of Android.